
Airstream Quilt Along
Airstream Quilt Along: Week 2
Week 2 is already upon us! This week, we’ll be working on the Whale Tail Airstream.
In the Quilt Along Group, I posted a video on gradients, and how color placement will change the look of your trailer. There are no wrong gradients! Both low volume, and solids will look amazing, as will a mix of them in the same block.
If you choose one color for the entire trailer, it will have a simple, modern look. If you choose 2-4 colors, it will have a more realistic look.
I mentioned in the video that you can make a photo black and white to see the gradient.
Be sure to not over think it. Whatever you choose, your block will look AMAZING!
License Plate:
– make sure you piece the light (unit O) properly. The outside of the seams WILL match, if it’s lined up the right way. If it’s not, rotate it 90 degrees (which direction doesn’t matter).
For the background:
This is a fun place to think about “Where is your trailer”? I love fabrics that suggest a forest, or night sky, or a sunset. Is your trailer in a canyon, or on the beach or in the mountains? Is it traveling down the road?
Can you see a reflection in the window, or is there yellow light streaming through the window? Are your windows tinted, or covered with a curtain?
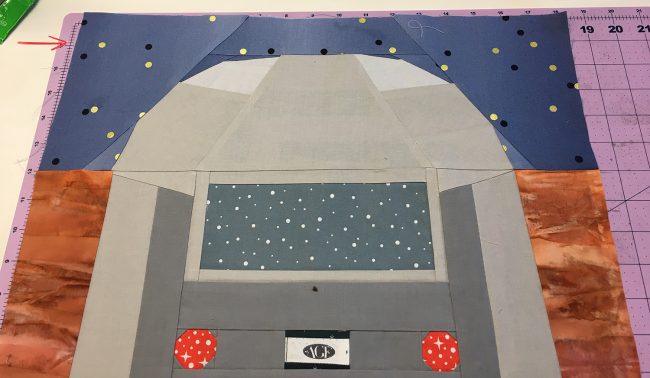
Upper Right and Left Corners:
TWICE I have sewn the wrong corner to the wrong side. Learn from my haste (sometimes you just get in a groove, and accidently grab the wrong piece!!!) The best way to mitigate this is to mark what side it goes on. 🤦🏽♀️ Or mark which piece it attaches to. You might even mark which end is up
This is important because it will make your blocks wonky, then your final trimming will be off.
 The first time I sewed the corners, I pieced them the wrong way, and it made for seams that didn’t match up. This should have been my first indication.
The second time, the pieces lined up, but when I flipped them out, the block wasn’t square. You can see this where the arrow is in the picture above.
What you can do: Had I followed my suggestion of allowing extra fabric on the top and side of the large single units, I wouldn’t have had this ‘problem’. I use air quotes, because, in the end, it won’t matter if the block is trimmed to 18.5″ or 18″.
In other news, I ran out of spray baste – I thought it was a travesty, but had an idea: glue stick! I use them for English Paper Piecing…and they work like a charm. If you’re thinking you need to purchase expensive Sew Line glue….you do not. I buy cheap Scholastic (brand) glue at the office supply store (whatever they are going by these days…) for EPP (English Paper Piecing). Rub that glue stick all over the paper, and stick it on the back of the fabric. Presto!!
I really like that the glue doesn’t leave a residue (the spray baste will come off in the wash, but is unsightly for photos. If you use a white glue stick you won’t have any problems. I’ve used the purple glue sticks; I’m not a fan. I have noticed that it can burn on the fabric. I have not yet washed my EPP blocks that I used the purple glue stick on, so I can’t speak to whether it comes off or not. I certainly hope it does! I have not had the same burn problem with white glue.
So, I’ll be switching to using a glue stick in lieu of spray baste for the large pieces.
Happy sewing! I’ll “see” you in the Quilt Along! 💝