English Paper Piecing
How to Glue Baste with English Paper Piecing
When you are glue basting hexagons, it doesn’t really matter how you do it. Swipe the glue, press, done. When you get into intricate shapes, or smaller shapes, the way you glue baste becomes important.
I am a huge fan of cheap school glue sticks . I get a 4 pack of white, washable school glue sticks for about $2 (less if it’s school supply time!), and they last for a long time. I don’t like the colored glue sticks because they have burned my fabric before. So white it is.
You might be wondering when the glue comes out. I remove the papers after I press then trim. Then I give another press (with starch after I remove the papers). The heat from the iron helps release the glue. If you are joining your blocks together by hand, you’ll need to wait to remove papers until all sides are joined to another block, or your quilt is done. I join my blocks by machine, so I remove the paper when the block is completed.
One of the best things about English paper piecing is the learning curve is really short, and you can have great success quickly!! One challenge is basting. There are 2 methods: glue and thread basting. I don’t recommend thread basting for my patterns because they are so intricate.
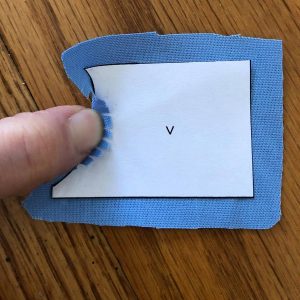
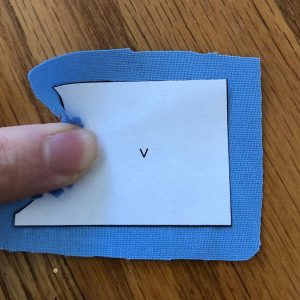
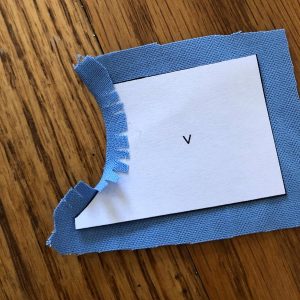
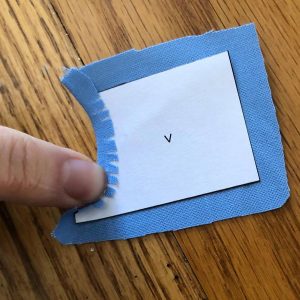
There are 2 methods of gluing: you can glue on the paper, or you can glue on the fabric. Typically, I glue on the paper. For INSIDE CURVES I find it is easier to glue on the fabric, but I think it’s because I live in a dry climate. Who knows. I also glue one side, then the next, and I rotate around. I’m a leftie, so I go rotate clockwise…your direction doesn’t matter.
 How to Fold Corners
 How to Fold Corners
I started mitering my corners about a year ago. This method means that there isn’t a tiny bit of fabric on the corners that are double thickness. When I was working on my Farmer’s Wife quilt a few years ago, I realized that I needed to lift the corner to make the seams tight. Then it occurred to me that I didn’t have to fold the corners at 90 degree angles. By folding at a 45 degree angle (or roughly), it cuts down on the bulk at the end of a template. This reduces the need to ease, and the template pieces fit together much better.
“What about nesting seams?” you might be asking. “Psh” is what I have to say. If you miter the corners, you can push them in one direction or another, but it seems to matter less because they don’t have as much bulk! When I’m done with a block, I press it, trim and move on. They can be willy nilly and it doesn’t bother me, as long as the front of the block is flat, it can do whatever it wants to in the back 🙂
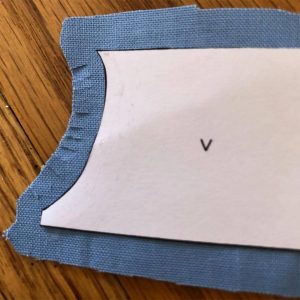
How to Fold Curves
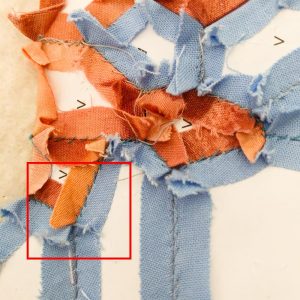
I was very confused by curved EPP. In fact, recently I watched a youtube video, and the stitcher used a regular whip stitch to join curves! YIKES! I use a flat back stitch and tape on the front of the templates to join the pieces together! It’s so much easier!!! (you can see the flatback stitch in the image above). But let’s talk about how to deal with tight curves.